
After getting a dental bridge, following proper post-care instructions supports healing and reduces the risk of complications. Initially, sticking to soft foods helps protect the bridge while your mouth adjusts to it.
Starting with options like smoothies and mashed potatoes allows for gentle chewing before gradually introducing semi-solid foods. Maintaining daily oral hygiene by brushing, flossing, and rinsing with mouthwash is critical.
Watching for signs of pain, swelling, or discomfort ensures any issues are addressed promptly. Consulting a trusted Encino dentist for guidance helps maintain the bridge’s durability and ensures a smooth recovery.

Immediate Post-Bridge Care Instructions
Right after receiving a dental bridge, take care to avoid disturbing the area. Gently clean the bridge using a soft-bristled toothbrush and non-abrasive toothpaste to prevent plaque buildup. Floss carefully around the bridge to remove debris without loosening it. Avoid hard or sticky foods that could shift the bridge or damage surrounding teeth.
If you experience discomfort, unusual pain, or instability in the bridge, please contact your dentist for an evaluation. Attending follow-up visits allows the dentist to confirm that the bridge is properly positioned and functioning as intended.
Soft Diet Recommendations for Recovery
A soft diet can make the healing process more comfortable and prevent damage to the new bridge. Soft foods reduce pressure on the area and minimize irritation. Smoothies are easy to consume and provide nutrients without requiring much chewing. Mashed potatoes are gentle on the gums and filling.
Yogurt is soothing and supports oral health while providing protein and probiotics. Eating these foods during the first weeks after placement allows the bridge and surrounding tissues to adjust safely.
Foods to Avoid After Dental Bridge Placement
Certain foods can jeopardize a newly placed dental bridge. Sticky items like caramels and chewing gum can pull at the bridge, while hard foods such as nuts, candies, or ice may crack or loosen it. Biting directly into firm foods like raw apples, corn on the cob, or tough meats can also cause damage.
During the healing period, softer alternatives such as cooked vegetables, tender meats, pasta, and other easy-to-chew foods are safer choices. Being mindful of your food selection helps protect the bridge while your mouth recovers.
Ideal Timeline for Resuming Regular Eating
After the initial healing period, you can gradually return to a regular eating routine while respecting the recovery process. During the first two weeks, focus on soft foods to avoid putting excessive pressure on the bridge.
In weeks three and four, introduce semi-solid foods that require light chewing, such as cooked vegetables and tender meats. By week five and beyond, most people can resume a normal diet, continuing to avoid foods that are extremely hard or sticky to maintain the integrity of the bridge.
Hygiene Tips for Maintaining Oral Health
Proper oral hygiene is critical for protecting a dental bridge and supporting long-term oral health. Brushing twice daily with a soft-bristled toothbrush and fluoride toothpaste helps keep the bridge and surrounding teeth clean and healthy.
Flossing carefully with regular floss or a floss threader removes trapped food and reduces plaque buildup. Using an antimicrobial mouth rinse can further minimize bacteria in the mouth.
Regular dental check-ups allow a dentist to monitor the bridge’s condition and overall oral health. Avoiding sticky or hard foods complements these hygiene practices to prevent damage and support healing.
Signs of Complications Requiring Professional Attention
Certain signs indicate that professional care is necessary after a dental bridge placement. Persistent pain around the bridge may suggest a problem that requires assessment. Swelling in the gums or face can be a warning of infection or irritation.
Difficulty chewing or noticing a change in bite alignment may indicate that the bridge needs to be adjusted. Addressing these issues promptly with your dentist can prevent further complications and support the long-term success of your dental bridge.
Related Topics:
To safely and effectively fix a loose dental bridge at home, start by evaluating the bridge to determine the extent of the issue. Maintaining proper oral hygiene is essential, so brush thoroughly, floss, and rinse with mouthwash. Applying a small amount of dental adhesive can help temporarily stabilize the bridge.
Make sure the area is clean and dry before placing the bridge, and allow the adhesive to set for 5-10 minutes. Monitor the bridge for stability, checking for movement and gum irritation. Following these steps carefully can help maintain the bridge while waiting to consult a professional for quality dental care.
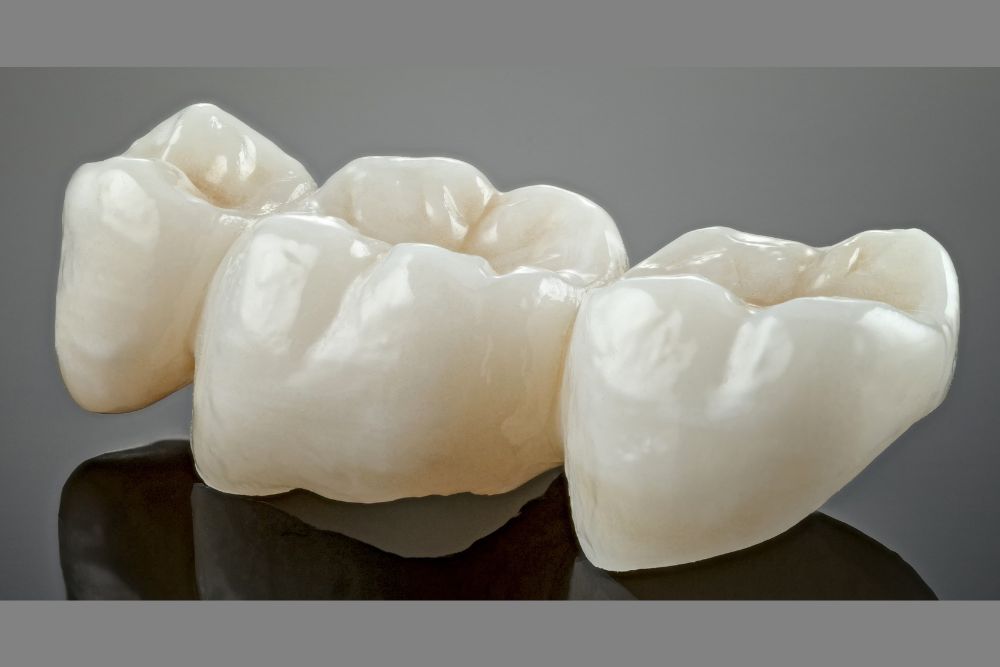
Assessing the Loose Dental Bridge
When a dental bridge feels loose, begin by carefully examining the area to determine the extent of the issue. Gently probe around the bridge with clean fingers to detect movement or discomfort. Check whether the bridge remains securely attached to the surrounding teeth and inspect for any signs of damage or wear.
Examine the gums for signs of redness or inflammation, as these can provide clues about oral health. This assessment helps identify the cause of the looseness and guides the steps needed to stabilize the bridge safely.
Cleaning the Area Thoroughly
Proper cleaning is important for maintaining the health of a loose dental bridge. Use a soft-bristled toothbrush to brush around the bridge, reaching all edges where debris and bacteria can accumulate. Floss underneath the bridge with a floss threader or specialized floss to remove trapped particles.
Rinsing with an antimicrobial mouthwash helps reduce the amount of bacteria. Ensuring a clean oral environment supports the bridge’s function and contributes to long-term dental health. Regular dental visits are recommended to monitor the bridge and surrounding teeth.
Applying Dental Adhesive
Applying dental adhesive can temporarily secure a loose dental bridge until professional care is available. Before applying, confirm the bridge and surrounding teeth are clean and dry. Apply a small amount of adhesive to the inner surface of the bridge, then carefully place it back into position.
Hold it gently in place for a few moments to allow the adhesive to set. Following the product instructions ensures proper application and effectiveness. This step can help restore stability and reduce discomfort while waiting for a permanent solution.
Securing the Bridge in Place
To maintain the bridge’s stability, gently bite down on a piece of clean gauze or a cotton swab after applying the adhesive. This pressure helps the bridge bond securely with the supporting teeth. Avoid chewing sticky or hard foods that could dislodge the bridge.
Regularly inspect the bridge for looseness or damage. Consistent oral hygiene and mindful eating habits support the bridge’s longevity and ensure it functions correctly during daily activities.
Allowing Time for Adhesive to Set
After applying the adhesive, allow 5-10 minutes for it to bond fully. Avoid eating or drinking during this period to prevent disturbing the setting process.
Apply gentle pressure if needed to ensure proper alignment, but do not force the bridge into place. Giving the adhesive enough time to set properly helps create a stable and durable temporary hold for the bridge.
Monitoring the Bridge for Stability
Once the bridge is in place, observe it carefully to ensure it remains secure. Test for movement by gently biting and moving your jaw from side to side. Check for gum irritation, such as redness, swelling, or soreness, which may indicate improper fit.
Start with soft foods and gradually test harder textures to confirm the bridge’s stability while chewing. Regular monitoring helps identify potential problems early and reduces the risk of further complications.
Related Topics:
- How Long After Dental Bridge Can I Eat: Dos and Don’ts for Healing
- How to Clean Dental Bridge for a Healthier Smile