
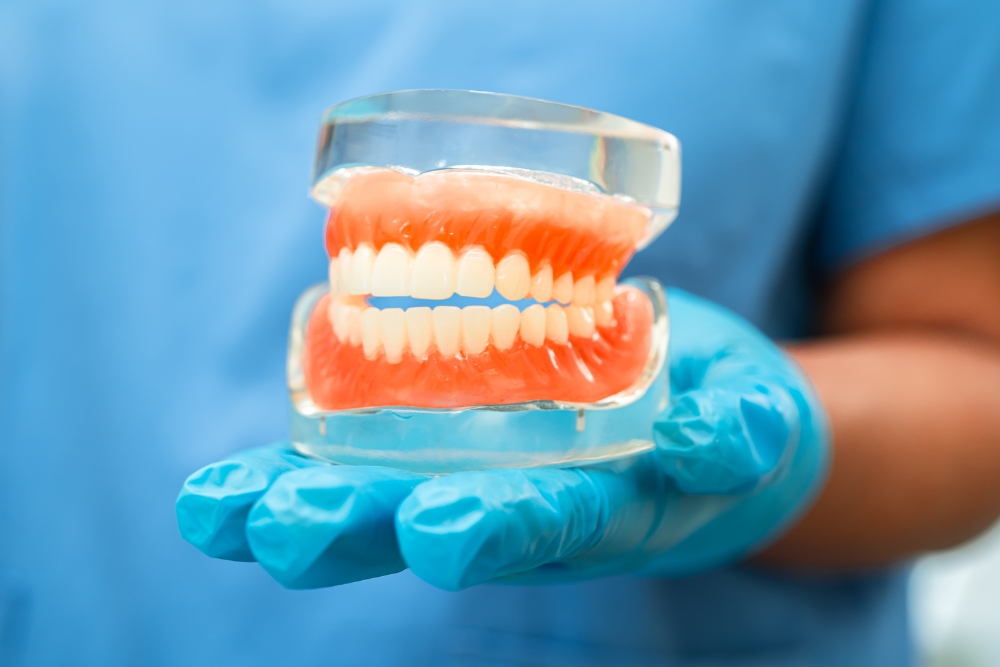
Dentures don’t last forever, and knowing when to replace them helps maintain your oral health and comfort. Your mouth naturally changes over time, which affects how your dentures fit and function. Finding trusted dental care means having a dentist who can monitor these changes and guide you on the right timing for replacements. Most dentures last between 5 and 10 years, but several warning signs can appear before then. Paying attention to these signals helps you avoid discomfort and more serious dental problems.
When Your Dentures Don’t Fit Right Anymore
Your jaw and gums change shape over time, which means dentures that once fit perfectly can become loose. You may notice that you’re using more adhesive than before, or your dentures slip when you eat or speak. Sore spots on your gums are another red flag that something’s off with the fit. When you bite down, your dentures might feel different or unstable. Your dentist can check these fit issues during regular appointments and help you decide if it’s time for new ones.
Cracks, Chips, and Other Damage
Dentures take a beating from daily wear and tear. Years of chewing and biting can create small cracks or chips in the material. These may seem minor, but they can worsen and make your dentures uncomfortable or even break completely. Worn-down surfaces can affect your dentures’ function and appearance. Check your dentures regularly for any signs of damage. Catching these problems early can save you from a sudden breakdown at an inconvenient time.
Pain and Sore Spots
Your dentures shouldn’t hurt. If you’re getting sore spots, ulcers, or constant irritation, something’s wrong. Poorly fitting dentures rub against your gums, creating painful areas in your mouth. Your jawbone naturally changes over time, which can make previously comfortable dentures problematic. Don’t ignore ongoing discomfort or try to push through it. Schedule a dental appointment to see whether adjustments can help or if you need replacements.
Trouble Speaking Clearly
Notice yourself mumbling or slurring words more than usual? Your dentures might be the culprit. When dentures don’t fit right, they move around while you talk, making it hard to form words clearly. Your tongue and lips need stable dentures to work properly for speech. If friends or family mention they’re having trouble understanding you, or you notice the change yourself, it’s worth getting your dentures checked. Speech problems often mean your dentures need replacing.
Your Mouth Structure Has Changed
The bone in your jaw naturally shrinks when you wear dentures because there are no tooth roots to keep it stimulated. This process, known as bone resorption, happens gradually and can make dentures loose and uncomfortable over time. Your gums can also shrink or recede, which can change how dentures fit in your mouth. These changes can create gaps, looseness, or uncomfortable pressure points. Regular dental visits help track these changes so you know when new dentures become necessary. If your dentures feel loose or create sore spots, they likely need to be replaced.
Your Dentures Are Getting Old
Even with great care, dentures wear out. The materials break down from constant use, cleaning products, and exposure to saliva and food. Older dentures often lose their shape and become less effective for chewing and speaking. They become more fragile and likely to crack or break. If your dentures are approaching or have passed the 5-7 year mark, start planning for replacements, even if they seem okay. Worn-out dentures can cause problems before they’re obviously damaged. Track how old your dentures are and consult your dentist to determine the best replacement timeline for your situation.
Related Topics:
The world of dentistry is as intricate as it is diverse, offering several treatment options for patients who have lost one or more teeth. Among the most established restorative options are dental implants, which are designed to replace missing teeth from the root upward. Unlike removable restorations, dental implants become integrated with the jawbone and can provide a stable foundation for a single crown, an implant-supported bridge, or a full-arch restoration.
Dental implants in Encino, CA are artificial tooth roots, most commonly made from biocompatible titanium, that are surgically positioned in the jawbone where teeth are missing. Once the implant has integrated with the surrounding bone, it can support a custom restoration that is designed to look, feel, and function more like a natural tooth. Because implants replace both the visible portion of a tooth and its underlying root structure, they can offer greater stability than traditional removable dentures or tooth-supported bridges.
Dental implants may be considered for patients who have lost teeth because of decay, gum disease, trauma, failed dental treatment, or other oral health concerns. They can also help patients who have struggled with loose or uncomfortable dentures and want a more secure restorative solution. However, implant treatment is highly individualized, and candidacy depends on factors such as bone volume, gum health, medical history, oral hygiene, and overall treatment goals.
What Are the Main Parts of a Dental Implant?
A dental implant restoration generally includes three primary components: the implant post, the abutment, and the final dental restoration. The implant post is placed into the jawbone and serves as the replacement tooth root. The abutment is attached to the implant and creates a connection between the implant and the visible replacement tooth.
The final restoration may be a crown, bridge, or implant-supported denture depending on how many teeth need to be replaced. Each component plays an important role in creating a stable, functional, and natural-looking result.
Understanding the Dental Implant Procedure in Encino, CA
The dental implant process typically begins with a comprehensive evaluation. During this visit, the dentist reviews the patient’s dental and medical history, examines the teeth and gums, and evaluates the jawbone. Dental imaging may be used to assess bone structure, determine implant positioning, and identify anatomical considerations that could affect treatment.
If there is sufficient healthy bone, the implant can be surgically positioned within the jaw. In some cases, patients who have experienced bone loss may first require a bone graft or another preparatory procedure before implant placement. The need for bone grafting varies from patient to patient and is determined after a clinical and radiographic evaluation.
After the implant is placed, a healing period generally follows. During this phase, the implant undergoes a biological process known as osseointegration, in which the surrounding bone gradually bonds with the implant surface. This integration is one of the most important factors in creating long-term implant stability.
Once healing and integration are sufficient, an abutment may be placed. The abutment functions as the connecting structure between the implant and the final crown or other restoration. Depending on the treatment approach, the abutment may be placed during the original implant procedure or during a later visit.
Once the abutment is in place, attention turns to the aesthetic and functional centerpiece of the process: the dental crown. Crafted with precision to replicate the appearance and function of a natural tooth, the crown is carefully designed to complement the patient’s surrounding teeth. Factors such as tooth shape, size, bite alignment, and shade are evaluated so that the final restoration blends naturally with the smile.
For patients replacing multiple teeth, the final restoration may involve an implant-supported bridge or a full-arch prosthesis instead of an individual crown. The treatment approach depends on the number and location of missing teeth, available bone, bite forces, and the patient’s goals.
How Long Does the Dental Implant Process Take?
The total treatment timeline varies considerably depending on the complexity of the case. Some patients may complete treatment in several months, while others may require additional healing time because of bone grafting, extractions, or other preparatory procedures.
Healing should not be rushed because successful integration between the dental implant and the jawbone is essential for long-term stability. The dental team will monitor healing throughout the process and determine when it is appropriate to move forward with the final restoration.
Who May Be a Candidate for Dental Implants?
Many adults with missing teeth may be potential candidates for dental implants, but a thorough evaluation is necessary before treatment. Ideal candidates generally have healthy gums, sufficient jawbone to support the implant, and a commitment to maintaining good oral hygiene.
Patients with bone loss should not automatically assume that dental implants are unavailable to them. Modern treatment planning may make it possible to rebuild or augment certain areas of the jaw before implant placement. In other cases, alternative implant techniques may be considered depending on the patient’s anatomy.
Medical conditions, medications, smoking, uncontrolled gum disease, and other health factors can influence implant healing and treatment planning. These considerations should be discussed openly during the consultation so that the dentist can determine whether implant treatment is appropriate.
The Importance of Dental Implants in Encino, CA
Dental implants can provide benefits that extend beyond replacing the visible portion of a missing tooth. Because the implant is positioned within the jawbone, it helps restore support in the area where the natural tooth root was lost. This can contribute to improved function and help preserve the structure of the smile.
Replacing missing teeth can also make eating and speaking more comfortable. Patients may find it easier to chew a wider variety of foods and may feel more confident speaking without worrying about a removable appliance shifting or becoming loose.
Another advantage of dental implants is that they generally do not require reshaping healthy neighboring teeth in the same way that a traditional tooth-supported bridge may. This allows the surrounding natural tooth structure to remain intact when clinically appropriate.
Can Dental Implants Help Preserve Jawbone?
When a natural tooth is lost, the jawbone in that area no longer receives the same stimulation that was previously provided through the tooth root. Over time, this can contribute to gradual bone resorption. Dental implants transmit functional forces into the jawbone, which may help maintain bone in the area around the implant.
Preserving jawbone can be especially important when multiple teeth are missing because significant bone loss may affect facial support, future restorative options, and overall oral function.
What Are the Benefits of Dental Implants?
Dental implants can offer several important benefits when properly planned, placed, and maintained. They can provide improved stability, support natural-looking restorations, enhance chewing ability, and reduce reliance on removable appliances.
Implant-supported restorations are also designed to function as part of the patient’s everyday bite. This can improve comfort and confidence when eating, speaking, smiling, and participating in social situations.
With proper care, dental implants may provide long-term function. However, they are not maintenance-free. Patients must continue brushing, flossing, attending routine dental examinations, and receiving professional cleanings to protect the gums and tissues surrounding the implants.
What Are the Potential Challenges of Dental Implant Treatment?
Like any surgical dental procedure, implant treatment involves certain limitations and potential risks. Healing may take several months, and some patients require additional procedures such as extractions, bone grafting, or gum treatment before implant placement.
Dental implants can also represent a larger initial investment than some alternative tooth-replacement options. The total cost varies based on the number of implants, the type of restoration, the complexity of the surgery, diagnostic imaging, bone grafting needs, and other factors.
Possible complications can include infection, insufficient bone integration, gum inflammation, implant mobility, or damage to nearby anatomical structures. Careful diagnosis, treatment planning, surgical technique, and ongoing maintenance can help reduce these risks.
Dental Implant Aftercare and Maintenance
Taking precautions and following proper aftercare instructions are important parts of successful dental implant treatment. Immediately following surgery, patients should follow the specific instructions provided by their dental team regarding oral hygiene, diet, medications, physical activity, and follow-up appointments.
Long-term implant care is similar in many ways to caring for natural teeth. Patients should brush at least twice daily, clean carefully around the implant restoration, and use floss or other interdental cleaning devices recommended by their dentist.
Smoking and tobacco use can negatively affect healing and may increase the risk of implant complications. Patients should discuss tobacco use and other lifestyle factors with their dentist before undergoing treatment.
Routine professional examinations are also essential because the dentist can evaluate implant stability, gum health, bite forces, and the condition of the restoration. Early identification of potential problems can help protect the implant and surrounding tissues.
How Long Can Dental Implants Last?
The lifespan of a dental implant varies from patient to patient. Many implants can remain functional for many years when they are placed correctly and supported by healthy bone and gums. Long-term success depends on oral hygiene, general health, smoking status, bite forces, gum disease risk, and regular dental care.
The implant itself and the visible restoration should also be viewed separately. While the implant post may remain stable for an extended period, a crown or other prosthetic component may eventually require repair or replacement because of normal wear.
Are Dental Implants Better Than Dentures or Bridges?
There is no single restorative option that is best for every patient. Dental implants, dentures, and bridges each have different benefits, limitations, costs, and treatment requirements.
Dental implants generally provide greater stability and do not rely on adhesives or neighboring teeth for support. Traditional dentures may be appropriate for patients who prefer a removable option or who are not candidates for implant surgery. Dental bridges may also be effective when neighboring teeth can appropriately support the restoration.
The best option should be based on the patient’s oral health, number of missing teeth, jawbone condition, budget, lifestyle, and long-term expectations.
Personalized Dental Implant Planning
At Sargon Dental, dental implant treatment is approached with careful planning and attention to each patient’s individual needs. Our team evaluates oral health, available bone, bite alignment, aesthetic goals, and overall health before recommending a treatment approach.
Advanced diagnostic and treatment-planning technologies can help determine implant positioning and identify factors that may affect the procedure. A personalized approach is particularly important for complex cases involving multiple missing teeth, bone loss, failing dental work, or full-mouth rehabilitation.
Patients are encouraged to ask questions about the proposed procedure, expected healing time, potential alternatives, treatment costs, maintenance requirements, and long-term expectations before moving forward.
Schedule a Dental Implant Consultation in Encino, CA
If you are considering dental implants because of missing, damaged, or failing teeth, a personalized consultation is the best way to determine whether implant treatment is appropriate for you. During your evaluation, the dental team can review your oral health, discuss available treatment options, and develop a plan based on your specific restorative needs.
Are you ready to learn whether dental implants may help restore your smile? Contact Dr. Sargon Lazarof and the team at Sargon Dental. You can also view our Encino practice location or schedule an appointment to discuss your dental implant options.
Frequently Asked Questions About Dental Implants
1. What Are Dental Implants?
Dental implants are artificial tooth roots that are surgically positioned in the jawbone to support crowns, bridges, or other dental restorations. They are commonly made from titanium and are designed to integrate with the surrounding bone.
2. How Do I Know If I Am a Candidate for Dental Implants?
Candidacy depends on factors including gum health, available jawbone, medical history, oral hygiene, smoking status, and the location of the missing teeth. A dental examination and imaging are generally required to determine whether implants are appropriate.
3. Do Dental Implants Look Like Natural Teeth?
The final implant restoration is custom-designed to match the size, shape, and shade of the surrounding teeth. When properly planned, the crown or bridge can provide a very natural-looking result.
4. Is Dental Implant Surgery Painful?
Local anesthesia and other comfort measures are generally used during implant placement. Patients may experience temporary soreness, swelling, or tenderness after the procedure, but discomfort can often be managed with the postoperative instructions provided by the dental team.
5. How Long Does It Take for a Dental Implant to Heal?
Healing time varies based on the patient’s health, implant location, bone quality, and whether additional procedures are required. Several months may be needed for the implant to integrate with the jawbone before the final restoration is completed.
6. Will I Need a Bone Graft Before Getting a Dental Implant?
Not every patient requires bone grafting. A graft may be recommended when there is not enough healthy bone to properly support an implant. Dental imaging can help determine whether additional bone preparation is necessary.
7. Can Dental Implants Replace Multiple Missing Teeth?
Yes. Dental implants can support a single crown, an implant-supported bridge, or certain full-arch restorations. The number of implants required depends on the number and location of missing teeth and the patient’s anatomy.
8. How Should I Care for Dental Implants?
Dental implants should be cleaned every day through brushing, flossing, and any additional hygiene techniques recommended by the dentist. Regular professional examinations and cleanings are also important for protecting the gums and surrounding bone.
9. Can Dental Implants Fail?
Although dental implants have a strong history of clinical use, complications can occur. Infection, smoking, uncontrolled gum disease, inadequate bone integration, excessive bite forces, and certain medical factors can increase the risk of problems.
10. How Can I Schedule a Dental Implant Consultation in Encino?
You can contact Sargon Dental through our contact page to schedule a consultation. During your visit, the dental team can evaluate your teeth, gums, and jawbone and discuss whether dental implants may be appropriate for your needs.
Dental implant treatment should always be based on an individual clinical evaluation. Treatment recommendations, healing times, risks, and results vary depending on each patient’s oral health, medical history, anatomy, and treatment needs.
Leaving cavities without treatment can cause serious problems for your teeth and health. This guide explains what happens when tooth decay goes untreated and why quick action matters. You’ll learn about the risks, how cavities get worse over time, warning signs to watch for, and problems that can happen if you wait too long. Getting help early can save your teeth and prevent pain, so it’s important to visit your dental clinic when you notice any issues.
Risks of Untreated Cavities
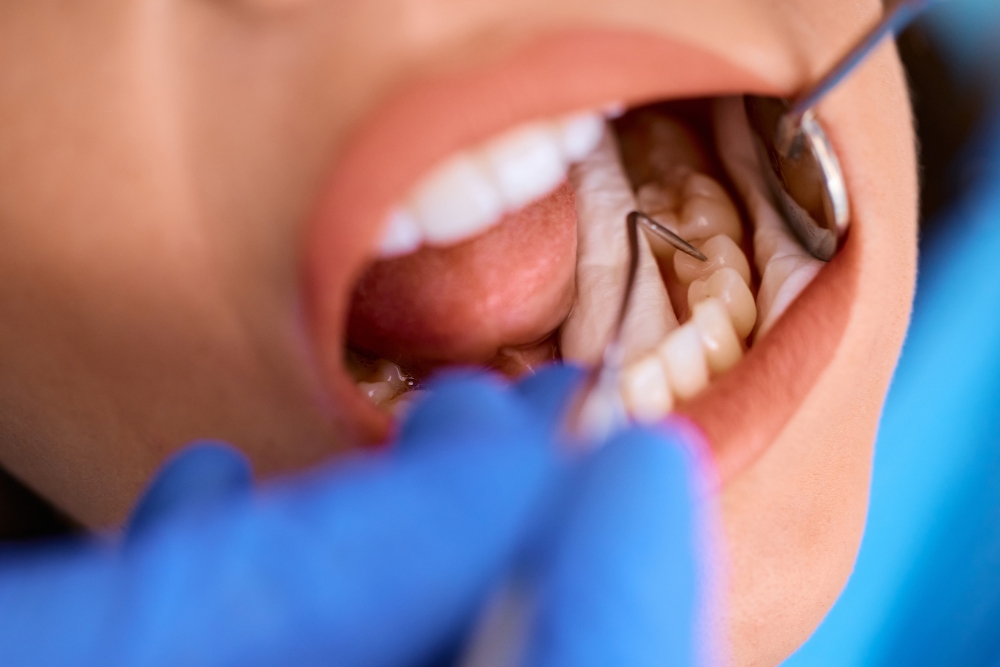
Ignoring cavities can cause serious problems for your mouth and body. When you don’t treat cavities, they keep getting worse and can cause pain, infection, and tooth loss. Cavities form when bacteria in your mouth make acids that eat away at your tooth’s hard outer layer. If you don’t get treatment, the hole gets deeper and reaches the soft inside part of your tooth where nerves live. This can cause severe toothaches and infections called abscesses. Untreated cavities can also affect your whole body since mouth infections have been connected to heart problems and other health issues. It’s important to fix cavities quickly to keep your mouth and body healthy.
Progression of Dental Decay
Tooth decay happens slowly as acid-making bacteria break down your teeth bit by bit. The decay happens in steps, with each step causing more damage:
- Initial Demineralization: The hard outer layer of your tooth starts to weaken, creating a small hole
- Enamel Erosion: The hole gets deeper and reaches the next layer, making your tooth more sensitive
- Dentin Destruction: The decay goes even deeper into the soft center of your tooth, causing severe pain and possible infection
Knowing how tooth decay spreads shows why finding and treating cavities early is crucial for saving your teeth.
Symptoms of Advanced Cavities
When cavities get bad, you might notice constant tooth pain, visible holes in your teeth, and sharp pain when eating hot or cold foods. Constant toothache often means the cavity has gotten deep enough to affect the nerve inside your tooth. You might see actual holes or dark spots on your teeth where the decay has eaten through the tooth structure. Sharp pain from hot or cold drinks or food happens because the decay has reached deeper layers and exposed the nerves. If you have any of these signs, you need to see a dentist right away to prevent the cavity from worsening and causing bigger problems.
Complications From Delayed Treatment
Waiting too long to treat cavities can lead to serious problems that affect your mouth’s health. If you don’t get treatment, cavities can get worse and cause issues like:
- Tooth Infection: The decay reaches the soft center of your tooth, causing an infection that might need a root canal treatment
- Abscess Formation: A painful pocket of infection forms at the tooth root, causing swelling and severe pain
- Tooth Loss: In serious cases, you might lose the tooth completely, making it hard to chew and speak normally
You need to treat cavities quickly to avoid these problems and keep your mouth healthy.
Importance of Timely Dental Care
Getting dental care quickly is the key to stopping cavities from causing serious problems. When you treat cavities early, you avoid more damage that would need expensive treatments like root canals or tooth removal. Quick dental care means cavities can be fixed with simple fillings when they’re still small. Regular dental visits help dentists find cavities early, before they cause pain or infection. By getting dental care when you need it, you can keep your teeth healthy, avoid pain, and prevent more serious dental issues later. Remember, preventing problems is always easier and cheaper than fixing them after they get serious.
Related Topics:
After getting a dental bridge, following proper post-care instructions supports healing and reduces the risk of complications. Initially, sticking to soft foods helps protect the bridge while your mouth adjusts to it.
Starting with options like smoothies and mashed potatoes allows for gentle chewing before gradually introducing semi-solid foods. Maintaining daily oral hygiene by brushing, flossing, and rinsing with mouthwash is critical.
Watching for signs of pain, swelling, or discomfort ensures any issues are addressed promptly. Consulting a trusted Encino dentist for guidance helps maintain the bridge’s durability and ensures a smooth recovery.

Immediate Post-Bridge Care Instructions
Right after receiving a dental bridge, take care to avoid disturbing the area. Gently clean the bridge using a soft-bristled toothbrush and non-abrasive toothpaste to prevent plaque buildup. Floss carefully around the bridge to remove debris without loosening it. Avoid hard or sticky foods that could shift the bridge or damage surrounding teeth.
If you experience discomfort, unusual pain, or instability in the bridge, please contact your dentist for an evaluation. Attending follow-up visits allows the dentist to confirm that the bridge is properly positioned and functioning as intended.
Soft Diet Recommendations for Recovery
A soft diet can make the healing process more comfortable and prevent damage to the new bridge. Soft foods reduce pressure on the area and minimize irritation. Smoothies are easy to consume and provide nutrients without requiring much chewing. Mashed potatoes are gentle on the gums and filling.
Yogurt is soothing and supports oral health while providing protein and probiotics. Eating these foods during the first weeks after placement allows the bridge and surrounding tissues to adjust safely.
Foods to Avoid After Dental Bridge Placement
Certain foods can jeopardize a newly placed dental bridge. Sticky items like caramels and chewing gum can pull at the bridge, while hard foods such as nuts, candies, or ice may crack or loosen it. Biting directly into firm foods like raw apples, corn on the cob, or tough meats can also cause damage.
During the healing period, softer alternatives such as cooked vegetables, tender meats, pasta, and other easy-to-chew foods are safer choices. Being mindful of your food selection helps protect the bridge while your mouth recovers.
Ideal Timeline for Resuming Regular Eating
After the initial healing period, you can gradually return to a regular eating routine while respecting the recovery process. During the first two weeks, focus on soft foods to avoid putting excessive pressure on the bridge.
In weeks three and four, introduce semi-solid foods that require light chewing, such as cooked vegetables and tender meats. By week five and beyond, most people can resume a normal diet, continuing to avoid foods that are extremely hard or sticky to maintain the integrity of the bridge.
Hygiene Tips for Maintaining Oral Health
Proper oral hygiene is critical for protecting a dental bridge and supporting long-term oral health. Brushing twice daily with a soft-bristled toothbrush and fluoride toothpaste helps keep the bridge and surrounding teeth clean and healthy.
Flossing carefully with regular floss or a floss threader removes trapped food and reduces plaque buildup. Using an antimicrobial mouth rinse can further minimize bacteria in the mouth.
Regular dental check-ups allow a dentist to monitor the bridge’s condition and overall oral health. Avoiding sticky or hard foods complements these hygiene practices to prevent damage and support healing.
Signs of Complications Requiring Professional Attention
Certain signs indicate that professional care is necessary after a dental bridge placement. Persistent pain around the bridge may suggest a problem that requires assessment. Swelling in the gums or face can be a warning of infection or irritation.
Difficulty chewing or noticing a change in bite alignment may indicate that the bridge needs to be adjusted. Addressing these issues promptly with your dentist can prevent further complications and support the long-term success of your dental bridge.
Related Topics:
Your teeth are designed to last a lifetime, but unfortunately, life may have other plans, forcing you to join the 178 million Americans who are missing at least one tooth. Although there are several replacement options, none excel in both form and function the way that dental implants do — mimicking your tooth right down to the roots. Now imagine that you can replace your tooth in just one visit with an option that will go the distance.

At Sargon Dental, our own Dr. Sargon Lazarof is the pioneer and inventor of Ultratooth, a dental implant restoration that is ready to perform after just one visit.
Here’s a look at how Ultratooth provides you with an immediate restoration option, giving you something to smile about.
Dental implants: The gold standard for missing teeth
Whether decay, disease, or an accident has robbed you of a tooth (or teeth), you need to find a replacement option that will help you smile, chew, and talk with ease. Checking all of these boxes are dental implants, which provide superior stability as we’re able to anchor the implant right into your jawbone. It’s for this reason, and more, that dentists place about five million implants each year in the United States.
One of the more serious problems that crops up with missing teeth is that you lose much more than meets the eye, namely the roots that go down into your jawbone. This loss causes bone deterioration since your jaw no longer registers activity in the area and ceases to rebuild the bone.
With a dental implant, we place a metal post into your jaw, and the bone builds up around it, fusing it into place. We then cap the post with a crown, which fits in seamlessly with your surrounding teeth.
Ultratooth: The platinum standard for missing teeth
Although there are many advantages to choosing a dental implant, the one challenge was that it was often a months-long process to place the implant because we had to wait for it to fuse into place before capping the implant.
Recognizing the need of our patients for faster replacement options, Dr. Sargon invented Ultratooth, which connects into your jawbone immediately after placement thanks to an innovative expansion feature that holds the implant in place. This feature allows you to use your tooth right away, while also allowing your jawbone to build up and around it naturally, further securing the implant.
To find out whether you’re a candidate for Ultratooth, Dr. Sargon first performs a complete evaluation of your dental and general health. Using advanced imaging, he ensures that your jawbone is healthy and that there are no signs of decay or disease.
Once he gives you the greenlight, Dr. Sargon is able to place the implant and crown in a single visit, allowing you to walk out with a tooth that’s clinically shown to last 30 years or more.
To get the most out of your Ultratooth implant, we recommend that you care for it as you would your existing teeth, which means brushing twice a day, flossing once a day, and rinsing after meals.
If you aren’t keen on the idea of waiting months to finally restore your smile, contact one of our locations in Encino or West Hollywood, California, to schedule your Ultratooth consultation.
A loose dental filling can catch you off guard, but knowing your options makes handling it much easier. This post covers temporary home fixes, over-the-counter solutions, and what to expect at a trusted dental office when you need a permanent repair. We’ll break down the common causes of loose fillings so you can prevent them down the road. You’ll also find aftercare tips to keep your fillings in good shape for years. Acting fast on a loose filling helps you avoid bigger problems later.
Common Causes of Loose Fillings
Understanding why fillings come loose can help you avoid the problem in the future. Poor oral hygiene, which leads to decay around the filling, is one of the main culprits. Grinding or clenching your teeth puts extra pressure on fillings and can loosen them over time. Eating hard or sticky foods can also knock a filling out of place. Fillings may wear down with age or shift if they weren’t placed correctly from the start. Regular dental checkups help catch loose fillings early before they cause more damage. Keeping up with brushing and flossing, and being mindful of habits that stress your teeth, goes a long way toward preventing this issue.
Temporary Fixes at Home
When a filling comes loose unexpectedly, a few temporary fixes can hold you over until you can see a dentist. Start by cleaning the area with warm water to clear out any food or debris. Over-the-counter dental cement can temporarily hold the loose filling in place. Just make sure the filling is dry before applying it. Avoid chewing on the side with the loose filling to prevent more damage. These home fixes offer short-term relief, but getting professional care quickly is the best way to avoid complications and get a lasting solution.
Dental Wax as a Temporary Solution
Dental wax is another option for temporarily securing a loose filling until you can get to the dentist. It’s a soft, moldable material that covers the exposed or loose filling and adds a layer of protection. To use it, clean and dry the area, then take a small piece of wax and shape it over the affected spot. Press it gently into place and smooth it out to create a secure seal. While dental wax can reduce discomfort and protect the filling for a bit, it’s still a temporary fix. Professional care is needed to permanently resolve the underlying problem.
OTC Dental Cement Application
Over-the-counter dental cement offers a quick way to temporarily secure a loose filling and prevent further discomfort. To apply it, clean the affected area thoroughly and dry it completely. Mix the cement according to the package instructions. Using a clean dental tool, place the cement over the loose filling and shape it to fit comfortably in your mouth. Let it sit for the recommended time before eating or brushing. OTC dental cement provides temporary relief, but it’s not a long-term fix. Schedule an appointment with your dentist as soon as possible.
Professional Dental Solutions
When you visit the dentist for a loose filling, they’ll likely recommend dental bonding or a dental crown, depending on the extent of the damage. Dental bonding uses a tooth-colored resin that’s applied to the tooth surface and hardened with a special light. This method works well for minor repairs and restores the tooth’s shape and function with a natural look. A dental crown, on the other hand, is a custom-made cap that covers the entire tooth for added strength and protection. Your dentist will assess the extent of the damage and recommend the best option for your situation to provide a solid, long-lasting fix.
Prevention and Aftercare Tips
Good oral hygiene habits are your best defense against future filling problems. Brush your teeth at least twice a day, floss daily, and use an antiseptic mouthwash. Regular dental visits for checkups and cleanings help keep your fillings healthy. Here are some extra tips to protect your dental work:
- Avoid hard or sticky foods that can damage fillings
- Use a nightguard if you grind your teeth
- Stay hydrated to prevent dry mouth
- Quit smoking to support better oral health
Related Topics:
Root canal treatments are supposed to clear out infection and save your tooth. But sometimes, an abscess sticks around even after the procedure is done. This can be frustrating and painful for patients who thought the problem was fixed. At West Hollywood’s best dental clinic, we see these cases and understand what’s behind them. This post breaks down the most common reasons an abscess might persist and what can actually be done about it.
Incomplete Removal of Infected Tissue
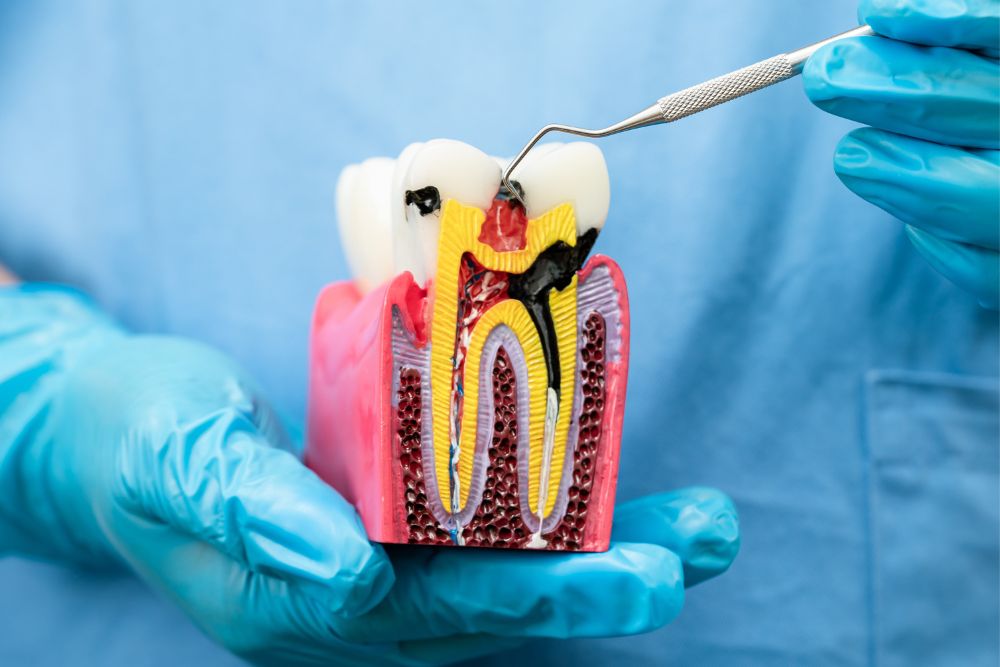
Root canal systems can be tricky to clean. Sometimes there are tiny side canals, fins, or narrow passages that hide bacteria. Standard hand tools don’t always reach these spots, leaving infected tissue behind. When that happens, the infection can flare back up and form an abscess. Using ultrasonic or rotary instruments along with microscopes helps dentists clean more thoroughly. Better cleaning reduces the risk of the abscess coming back.
Undetected Additional Canals
Finding every canal inside a tooth is harder than it sounds. Some teeth have extra canals that don’t appear on standard X-rays. If these get missed, bacteria hang out inside them and keep the infection going. Cone-beam CT scans and magnification tools make it easier to spot these hidden canals. An experienced endodontist knows where to look and how to thoroughly clean everything. Treating all the canals, not just the obvious ones, cuts down the risk of a lingering abscess.
Resistant Bacteria
Some bacteria are tougher than others. Strains such as Enterococcus faecalis and Porphyromonas gingivalis can form protective biofilms within the root canal. These biofilms make the bacteria harder to kill with standard cleaning solutions. Dentists may need to use advanced methods, such as laser-activated irrigation or specialized medications, to treat stubborn strains. Proper shaping and sealing of the canal also help eliminate these resistant bugs and prevent the abscess from lingering.
Poor Root Canal Treatment Quality
Not all root canals are done equally well. If the canals aren’t cleaned and shaped properly, or if infected tissue gets left behind, problems follow. Gaps in the filling material give bacteria a place to grow. Rushed procedures or less experienced practitioners can lead to these issues. Regular check-ups, magnification tools, and sticking to best practices all help improve treatment quality and reduce abscess risk.
Post-Treatment Complications
Even after a successful root canal, complications can still occur. Patients might experience ongoing pain, swelling, or a new abscess. This sometimes occurs due to missed canals, complex tooth anatomy, or incomplete disinfection. Thorough exams and imaging help catch these problems early. Proper sealing and restoring the tooth goes a long way in preventing issues down the line. When complications do happen, having your endodontist and general dentist communicating makes a big difference in getting things sorted out.
Delayed Crown Placement
Getting a crown placed quickly after your root canal matters more than most people realize. Waiting too long can cause problems:
- Risk of Bacterial Entry: Without a crown, bacteria can sneak back into the tooth through the access hole, restarting the infection.
- Weakened Tooth Structure: An unprotected tooth is more likely to crack or break, potentially leading to its loss.
- Appearance Issues: For front teeth, skipping or delaying the crown can affect how your smile looks and impact your confidence.
Getting your crown placed on time protects your investment in the root canal and keeps the tooth healthy for years to come.
Related Topics:
To safely and effectively fix a loose dental bridge at home, start by evaluating the bridge to determine the extent of the issue. Maintaining proper oral hygiene is essential, so brush thoroughly, floss, and rinse with mouthwash. Applying a small amount of dental adhesive can help temporarily stabilize the bridge.
Make sure the area is clean and dry before placing the bridge, and allow the adhesive to set for 5-10 minutes. Monitor the bridge for stability, checking for movement and gum irritation. Following these steps carefully can help maintain the bridge while waiting to consult a professional for quality dental care.
Assessing the Loose Dental Bridge
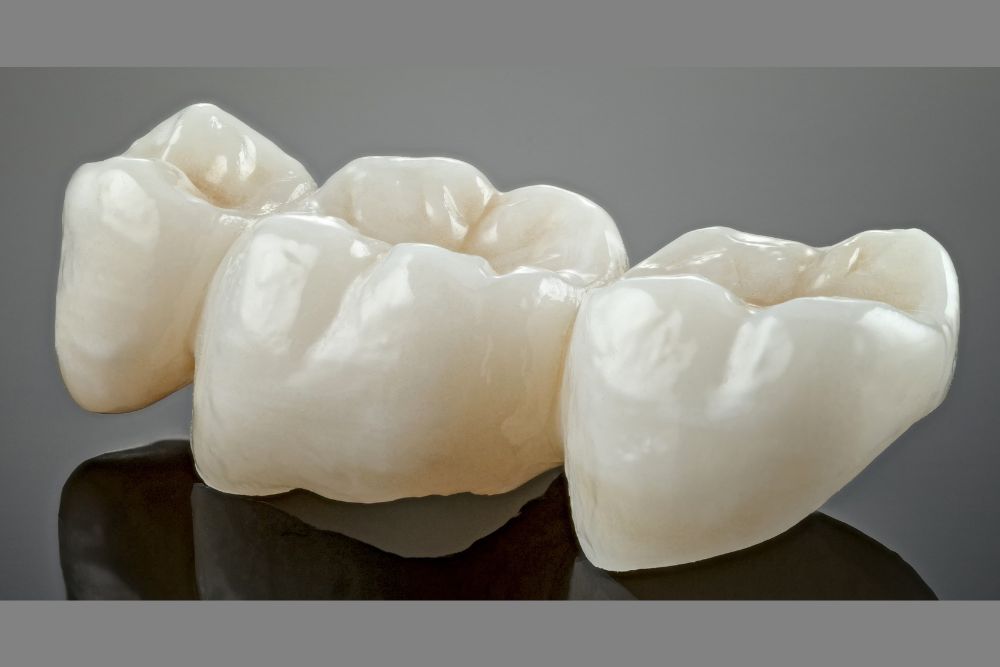
When a dental bridge feels loose, begin by carefully examining the area to determine the extent of the issue. Gently probe around the bridge with clean fingers to detect movement or discomfort. Check whether the bridge remains securely attached to the surrounding teeth and inspect for any signs of damage or wear.
Examine the gums for signs of redness or inflammation, as these can provide clues about oral health. This assessment helps identify the cause of the looseness and guides the steps needed to stabilize the bridge safely.
Cleaning the Area Thoroughly
Proper cleaning is important for maintaining the health of a loose dental bridge. Use a soft-bristled toothbrush to brush around the bridge, reaching all edges where debris and bacteria can accumulate. Floss underneath the bridge with a floss threader or specialized floss to remove trapped particles.
Rinsing with an antimicrobial mouthwash helps reduce the amount of bacteria. Ensuring a clean oral environment supports the bridge’s function and contributes to long-term dental health. Regular dental visits are recommended to monitor the bridge and surrounding teeth.
Applying Dental Adhesive
Applying dental adhesive can temporarily secure a loose dental bridge until professional care is available. Before applying, confirm the bridge and surrounding teeth are clean and dry. Apply a small amount of adhesive to the inner surface of the bridge, then carefully place it back into position.
Hold it gently in place for a few moments to allow the adhesive to set. Following the product instructions ensures proper application and effectiveness. This step can help restore stability and reduce discomfort while waiting for a permanent solution.
Securing the Bridge in Place
To maintain the bridge’s stability, gently bite down on a piece of clean gauze or a cotton swab after applying the adhesive. This pressure helps the bridge bond securely with the supporting teeth. Avoid chewing sticky or hard foods that could dislodge the bridge.
Regularly inspect the bridge for looseness or damage. Consistent oral hygiene and mindful eating habits support the bridge’s longevity and ensure it functions correctly during daily activities.
Allowing Time for Adhesive to Set
After applying the adhesive, allow 5-10 minutes for it to bond fully. Avoid eating or drinking during this period to prevent disturbing the setting process.
Apply gentle pressure if needed to ensure proper alignment, but do not force the bridge into place. Giving the adhesive enough time to set properly helps create a stable and durable temporary hold for the bridge.
Monitoring the Bridge for Stability
Once the bridge is in place, observe it carefully to ensure it remains secure. Test for movement by gently biting and moving your jaw from side to side. Check for gum irritation, such as redness, swelling, or soreness, which may indicate improper fit.
Start with soft foods and gradually test harder textures to confirm the bridge’s stability while chewing. Regular monitoring helps identify potential problems early and reduces the risk of further complications.
Related Topics:
- How Long After Dental Bridge Can I Eat: Dos and Don’ts for Healing
- How to Clean Dental Bridge for a Healthier Smile
Keeping your dentures clean at home is easier than you might think. Finding reliable dental care starts with proper home maintenance of your dentures. This guide walks you through simple daily and weekly cleaning steps that anyone can follow. We’ll cover what supplies you need, how to create a cleaning routine, and tips to keep your dentures in great shape. These methods help maintain good mouth health and keep your smile looking its best.
Importance of Denture Cleaning
Cleaning dentures every day is vital for good mouth health and preventing problems. When you don’t clean dentures properly, plaque builds up and bacteria grow, which can cause infections. Good cleaning keeps your dentures lasting longer and protects your gums and any natural teeth you still have. Dirty dentures collect food bits and germs that create bad breath and make your gums sore. Unclean dentures can also cause oral thrush and other mouth infections. Setting up a regular cleaning schedule with the right methods helps keep your dentures clean and your mouth healthy.
Materials Needed for Cleaning
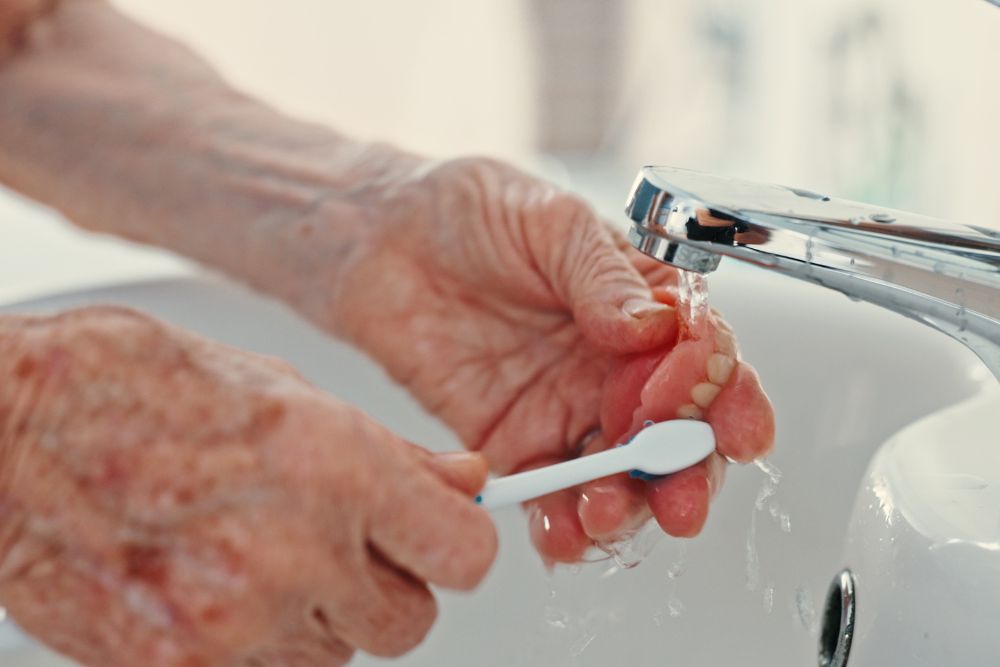
You’ll need a few basic items to clean your dentures well at home. Get a denture brush with soft bristles to scrub away food and plaque without scratching the denture surface. Use mild dish soap for daily cleaning to remove debris and germs safely. Pick up a denture cleaning solution for deeper cleaning that removes stains and bad-smelling bacteria. You’ll also need a container for soaking the dentures and a soft towel for drying them after cleaning. Having these supplies ready makes your denture cleaning routine quick and complete.
Daily Cleaning Routine
Clean your dentures every day with these simple steps. Rinse your dentures after each meal to wash away food particles. Use a soft brush and mild denture cleaner to gently scrub all surfaces, including the grooves and hard-to-reach spots. Don’t use regular toothpaste because it’s too rough and can damage your dentures. Clean your gums and any remaining natural teeth too for complete mouth care. Soak your dentures overnight in cleaning solution or water to keep them moist and prevent cracking. Following this daily routine helps your dentures last longer and keeps your mouth healthy.
Weekly Deep Cleaning Steps
Do a thorough deep cleaning once a week to keep your dentures in top condition. Please take out your dentures and rinse them with warm water to remove loose food bits. Brush them with a soft denture brush and mild cleaner, avoiding regular toothpaste that’s too harsh. Soak your dentures in denture cleaning solution or a mix of water and vinegar for 20-30 minutes to remove tough stains and kill bacteria. Rinse them well before putting them back in your mouth. This weekly deep clean keeps your dentures looking good and staying hygienic.
Tips for Maintaining Denture Hygiene
Keep your dentures in great shape with these helpful tips:
- Rinse dentures after every meal to stop food buildup
- Use gentle, circular motions when brushing to avoid damage
- Handle dentures carefully to prevent drops and cracks
- Soak overnight in denture solution to keep them moist
- Visit your dentist regularly to check the fit and condition
- Avoid hot water that can warp the denture material
- Don’t use harsh cleaners or bleach products
Following these simple tips helps your dentures stay clean, comfortable, and long-lasting while keeping your mouth healthy.
Related Topics:
Proper denture care at night helps keep your teeth healthy and comfortable. Your dentist will recommend cleaning routines that work best for your situation. Finding excellent dental services means getting advice on the right soaking solutions for your dentures. This guide explains the best ways to soak your dentures overnight and why it matters for your oral health.
Importance of Nightly Denture Soaking
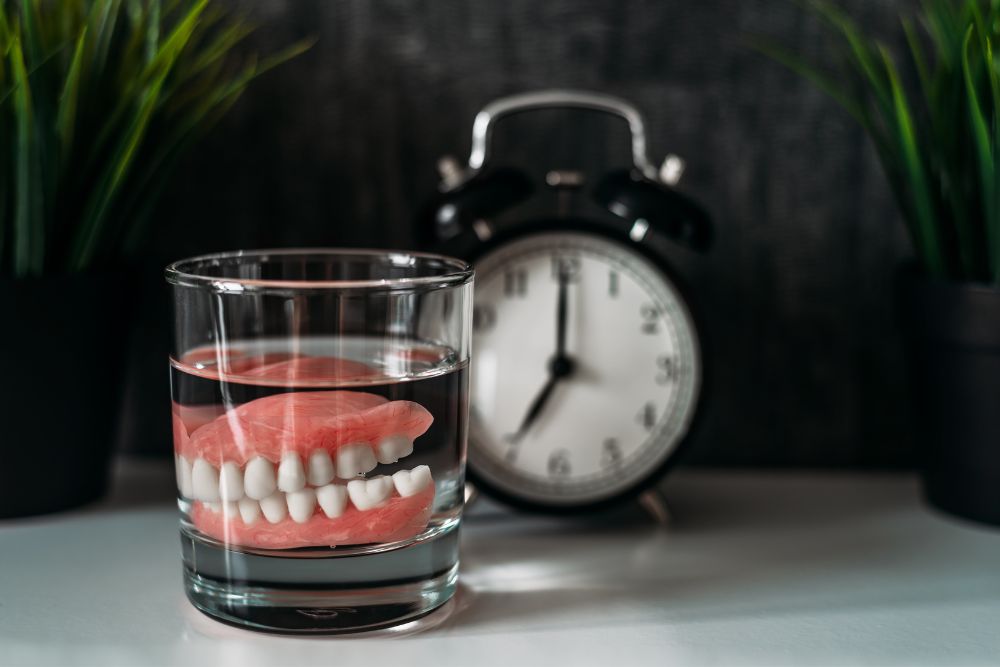
Soaking your dentures every night keeps them clean and healthy. During the day, plaque, bacteria, and food bits stick to your dentures and create problems if left alone. Soaking overnight helps remove these deposits and prevents buildup of tartar and stains. The soaking process also removes stubborn debris that brushing alone can’t handle. When you soak your dentures each night, you keep them fresh, clean, and free from germs that could cause infections. Make this a daily habit to protect your mouth and help your dentures last longer.
Best Soaking Solutions for Dentures
Picking the right soaking solution keeps your dentures in good shape. Choose products made just for denture care rather than regular household items. Denture cleaning tablets or fizzing solutions work well because they remove stains, plaque, and bacteria effectively. These products clean your dentures while helping them look good and last longer. You can also use equal parts white vinegar and water as a natural cleaning option. Always rinse your dentures well after soaking to remove any leftover solution. Never use bleach or harsh chemicals because they can damage your dentures. Pick a solution that’s gentle but still cleans well.
Tips for Effective Denture Cleaning
Good cleaning habits help your dentures stay in great condition. Follow these simple tips for the best results:
- Brush Daily: Use a soft brush made for dentures to remove food and plaque buildup.
- Use Mild Soap: Clean with gentle soap or denture cleaner to avoid damaging the material.
- Soak Regularly: Keep your dentures in cleaning solution or water overnight to stay moist and clean.
- Handle with Care: Don’t use hot water, rough cleaners, or harsh chemicals; always handle gently to prevent breaking.
Common Mistakes to Avoid
Some cleaning mistakes can hurt your dentures and make them wear out faster. Never use hot water because it can warp the shape of your dentures. Don’t use harsh or rough cleaners that can scratch the surface. Regular toothpaste is too abrasive and can damage dentures, so avoid using it. Don’t let dentures air-dry completely because they can lose their shape. Always handle your dentures carefully to prevent drops and breaks. Avoiding these mistakes helps your dentures stay clean and last longer.
FAQs About Denture Soaking
Here are answers to common questions about soaking dentures:
How often should I soak my dentures?
- Soak your dentures every night to remove plaque and bacteria effectively.
Can I use regular mouthwash to soak my dentures?
- No, regular mouthwash can be too strong for dentures. Use denture cleaner or special soaking solutions instead.
Should I rinse my dentures after soaking them overnight?
- Yes, always rinse your dentures well after soaking to remove any leftover cleaning solution.
Can I leave my dentures soaking for more than one night?
- It’s better not to soak dentures for more than one night, as it may change the material and how they fit.
Related Topics: